How to Develop a Test Automation Framework From Scratch?
In this step-by-step guide, I will describe how to develop a modularized Test Automation Framework from scratch using Java, Selenium, TestNG and Maven.
To begin with, let’s see what a Test Automation Framework is and what are the benefits of creating one.
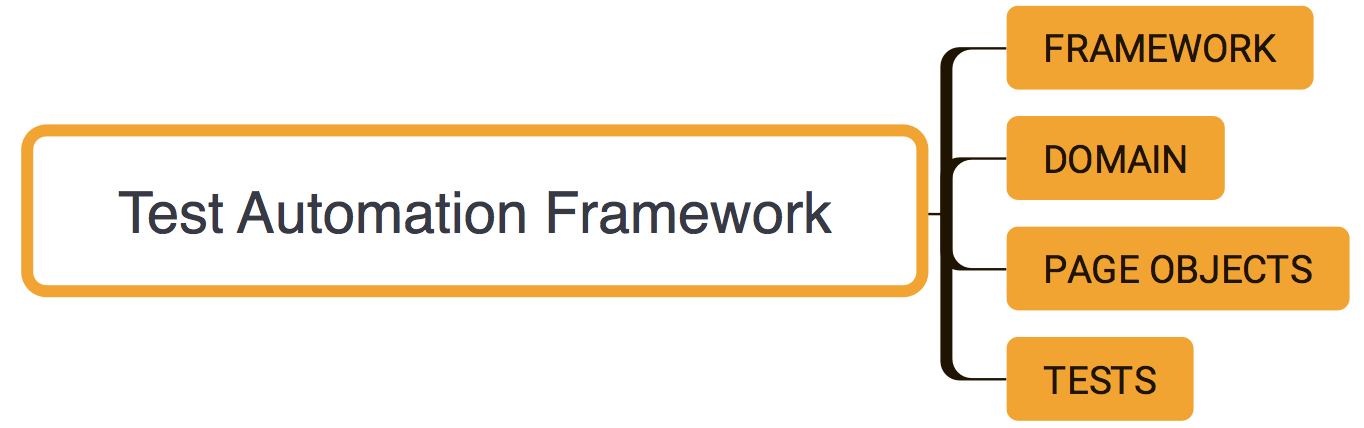
Test Automation Framework
What is the purpose of a Test Automation Framework? What challenges does it solve for the development team?
In agile development, you might not have enough time to automate your new features in time, so you might be creating automated scripts, duplicating a lot of code in many places.
Refactoring code is an inherent part of software development to avoid building up a huge tech debt. This also applies to test automation; by refactoring your automated scripts, you will improve readability and maintenance in the long run.
In this Test Automation Framework tutorial, the end product is a result of many refactorings over time. Obviously, continuous improvement is essential if we are going to get a good return on investment from test automation.
When creating a Test Automation Framework, we should consider the following main points:
- To be able to create automated tests quickly by using appropriate abstraction layers
- The framework should have meaningful logging and reporting structure
- Should be easily maintainable and extendable
- Should be simple enough for testers to write automated tests
- A retry mechanism to rerun failed tests - this is especially useful for WebDriver UI tests
In this tutorial, I will be using:
- Java as the programming language
- TestNG as the assertion framework
- Maven as the build tool
- WebDriver as the browser automation tool
- IntelliJ as the IDE
This Test Automation Framework tutorial is split into two parts:
Part 1: Creating the base project and modules and the dependencies
Part 2: Adding the code
In part 1 of this tutorial I assume you already have Java and Maven installed on your machine.
Steps to Create a Test Automation Framework From Scratch
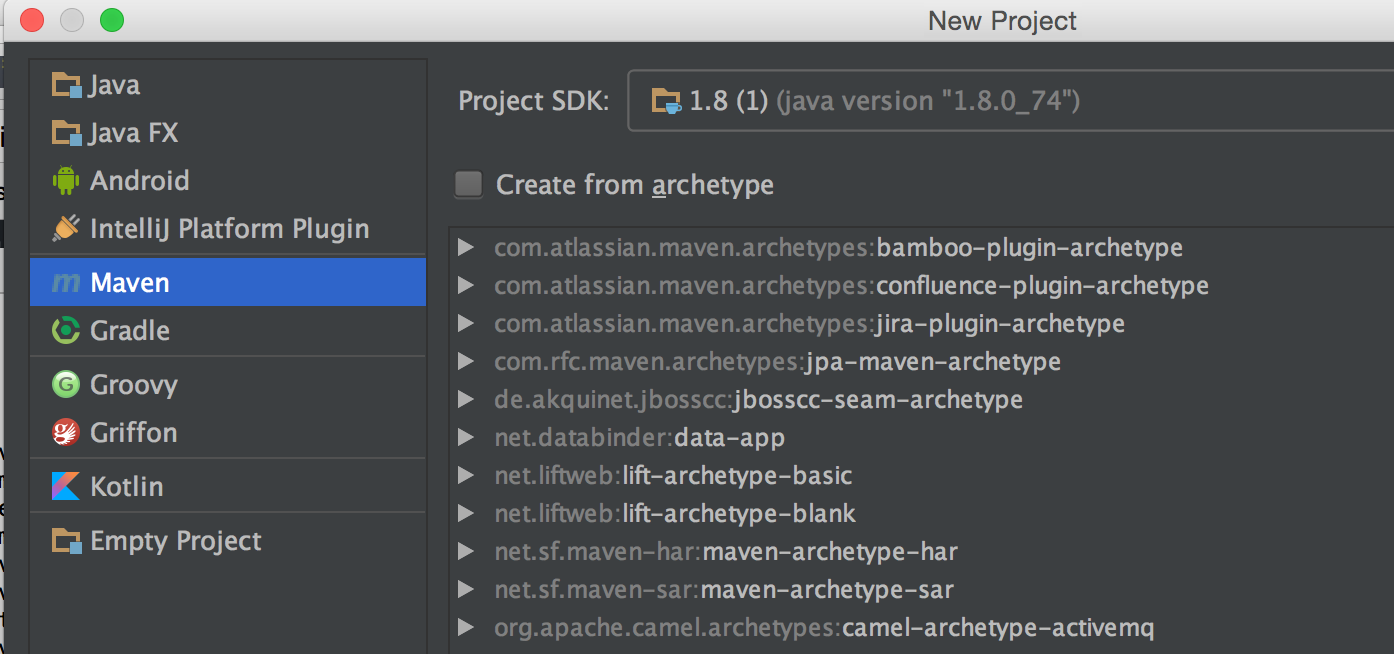
Step #1 - Create new maven project
Open IntelliJ IDE and select New Project from the menu. You are then presented with a screen to select the type of the project you are interested in.
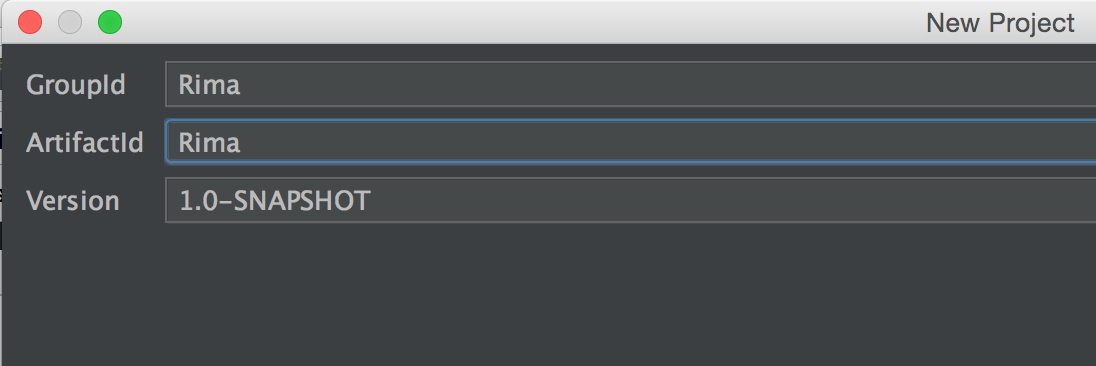
Step #2 - Give your project a name
Select Maven as the project type. Provide a name for GroupId and ArtifatId - I have decided to name this Test Automation Framework, Rima.
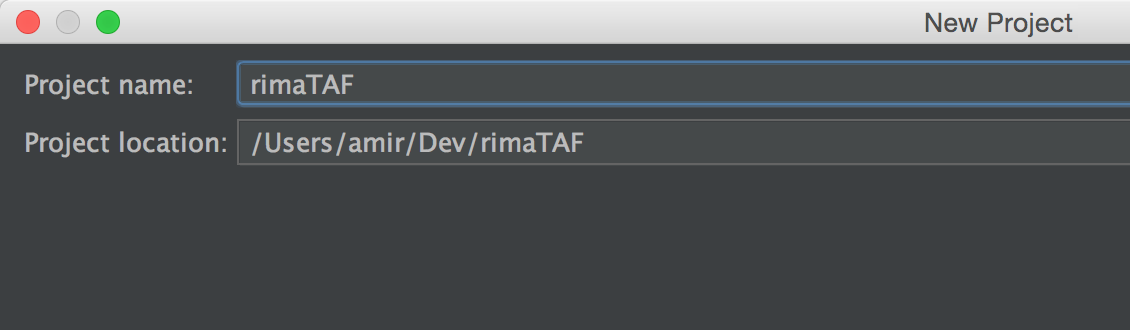
Step #3 - Choose the location of your project
Now, choose a name for your project and select a directory for your workspace
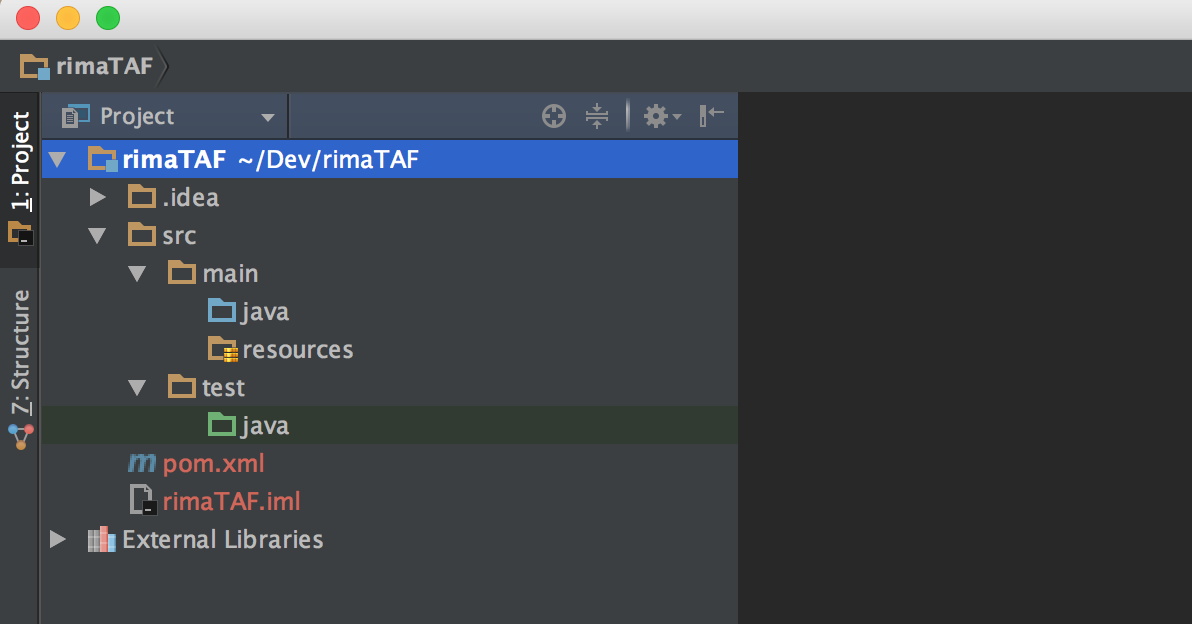
Step #4 - Base project is created
You now have a base project created. We can start creating maven modules in this project to organize the structure of our Test Automation Framework.
And this is how our pom.xml looks like
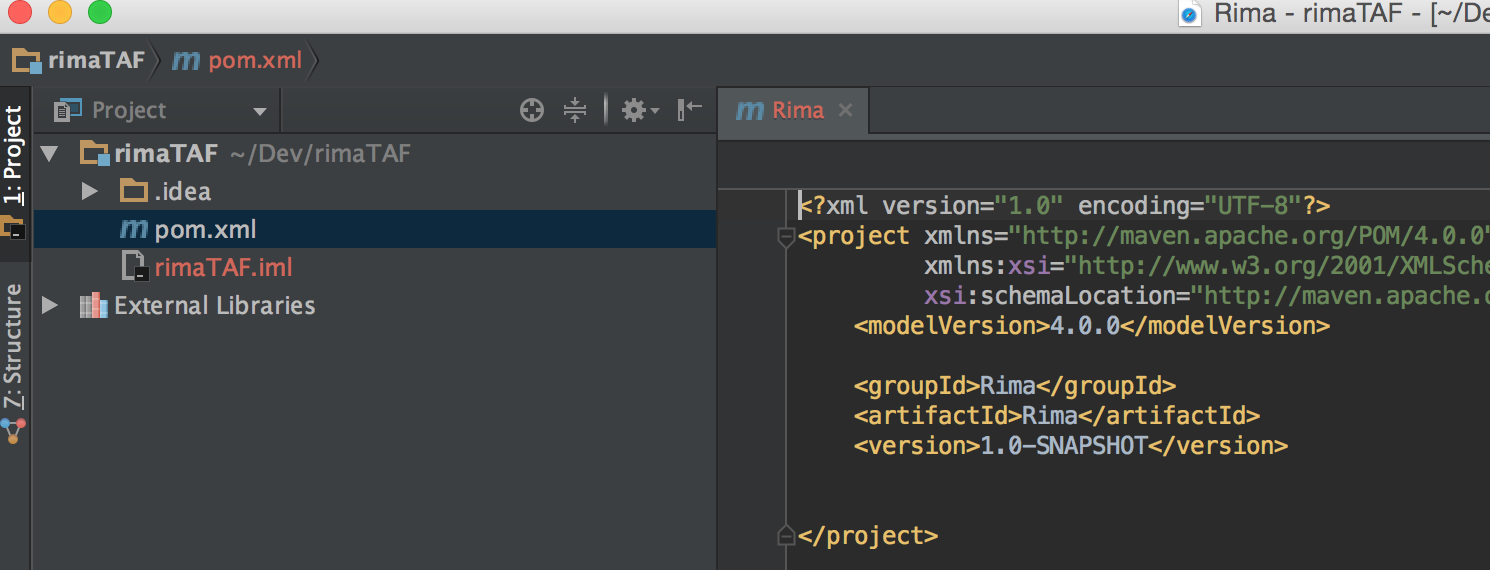
As this is going to be our base project with the parent pom.xml, we won’t have any code in this project. Instead, we will create maven modules for different parts of the Test Automation Framework. Go ahead and delete the src folder.
Step #5 - Create different modules
Now we are in a position to create different maven modules for our framework. We will create the following modules:
rima-framework - this module contains all the related classes and methods to facilitate creating automated tests.
rima-domain - this module contains the domain specific language (DSL) classes.
rima-page-objects - as the name suggests, this module contains the page objects.
rima-regression-tests - and finally our automated regression tests.
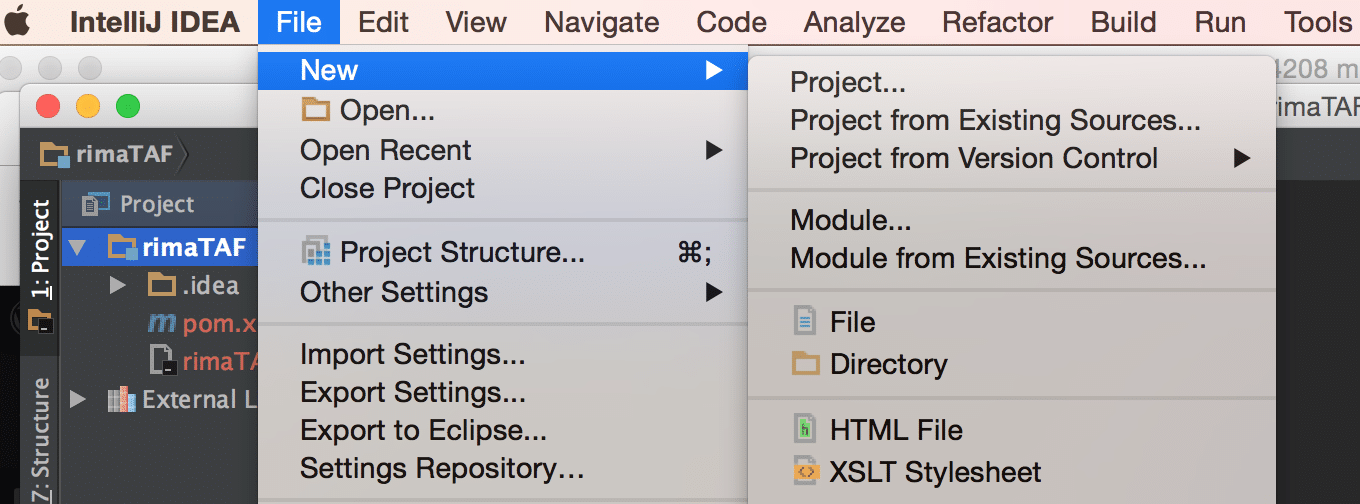
We will start by creating the rima-framework module. To do this, select File > New > Module
Select Maven module and click Next
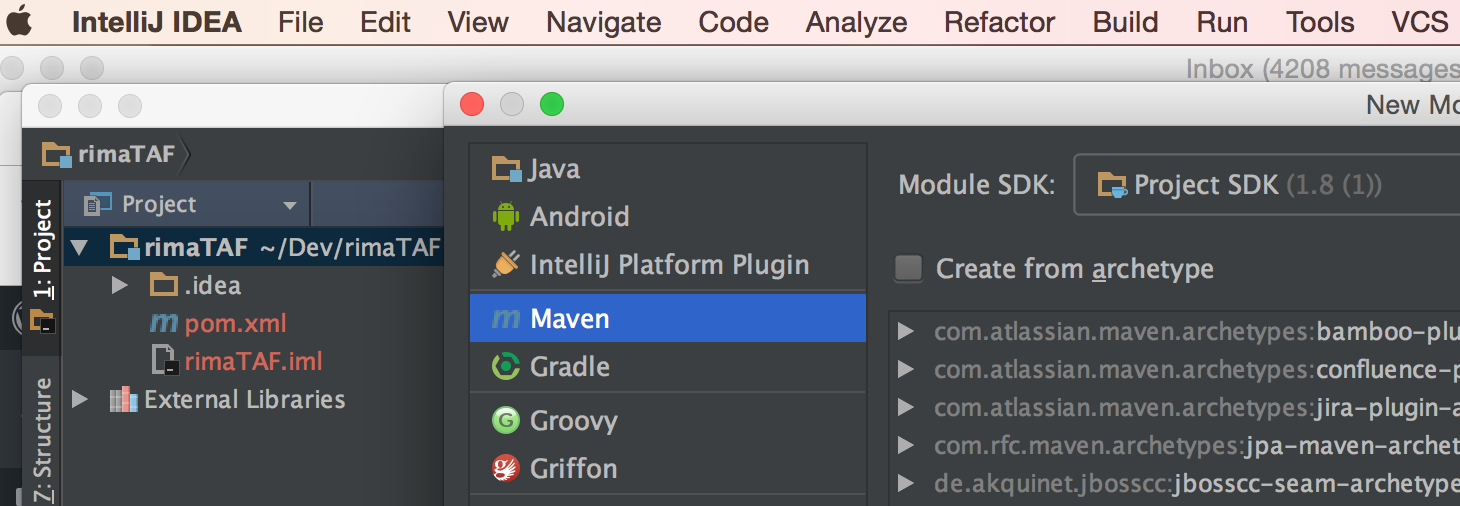
In next screen, you can give the artifactId of the module you are creating, in this case, rima-framework
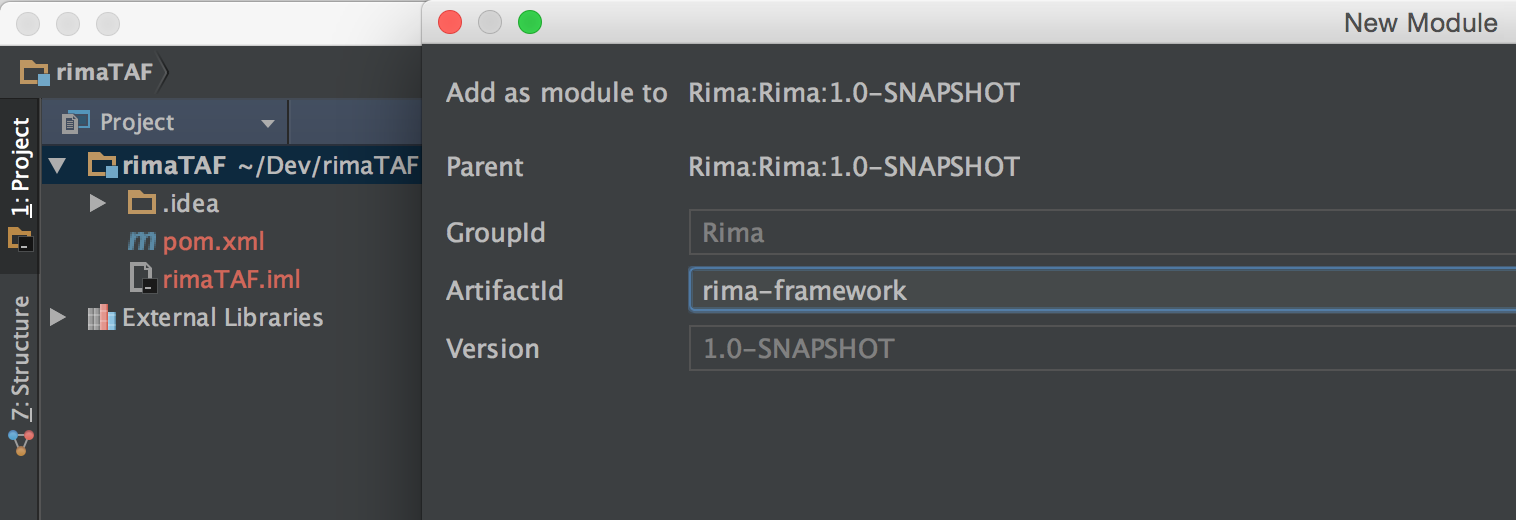
Note the parent module and the groupId as Rima and click Next where we can give the name of the module and click Finish.
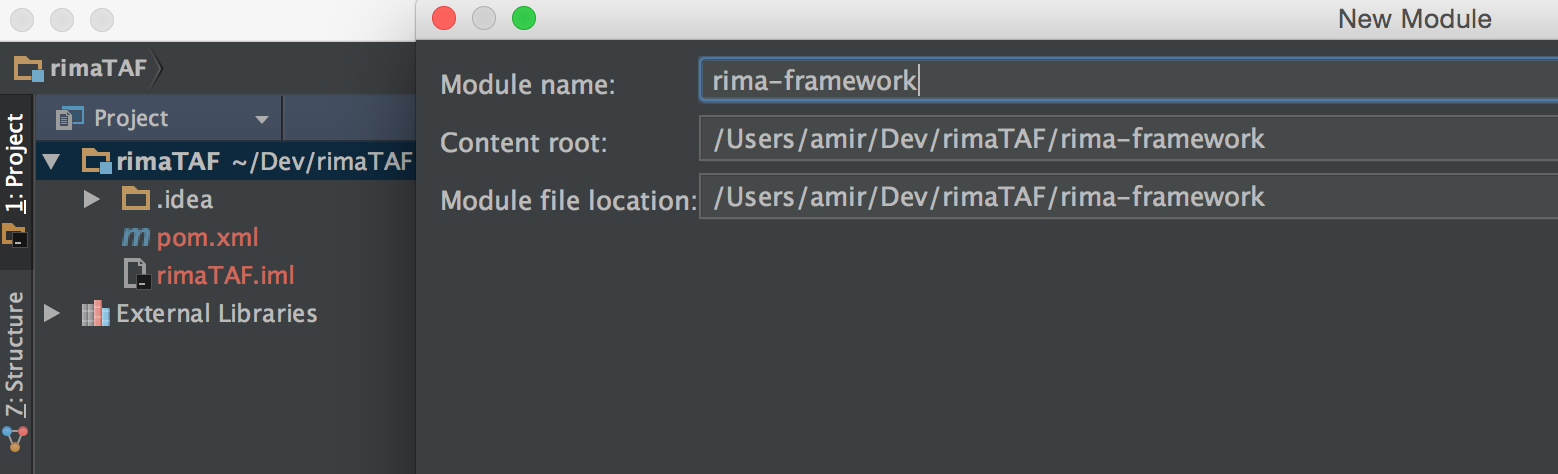
Once rima-framework module is created, it should look something like this
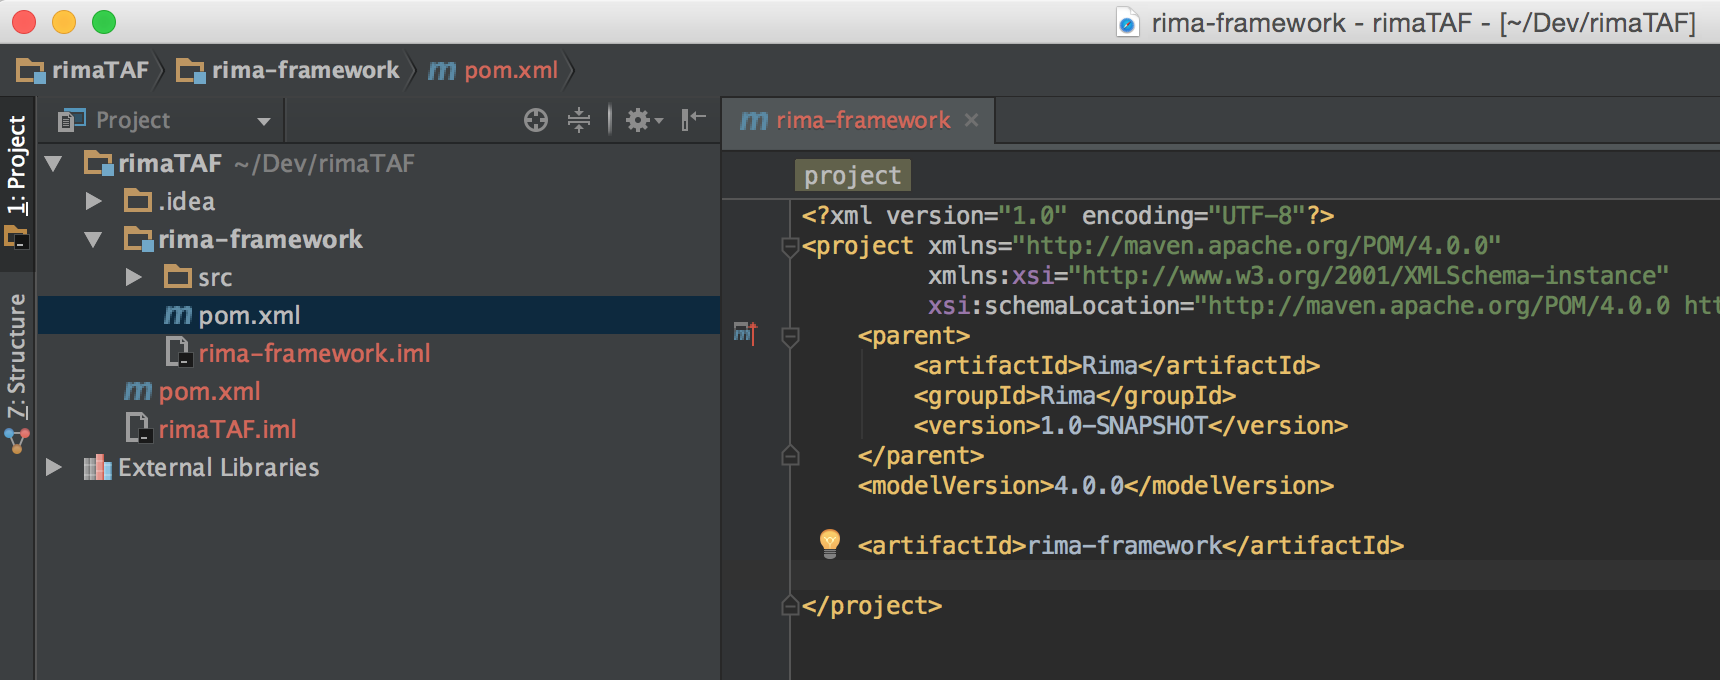
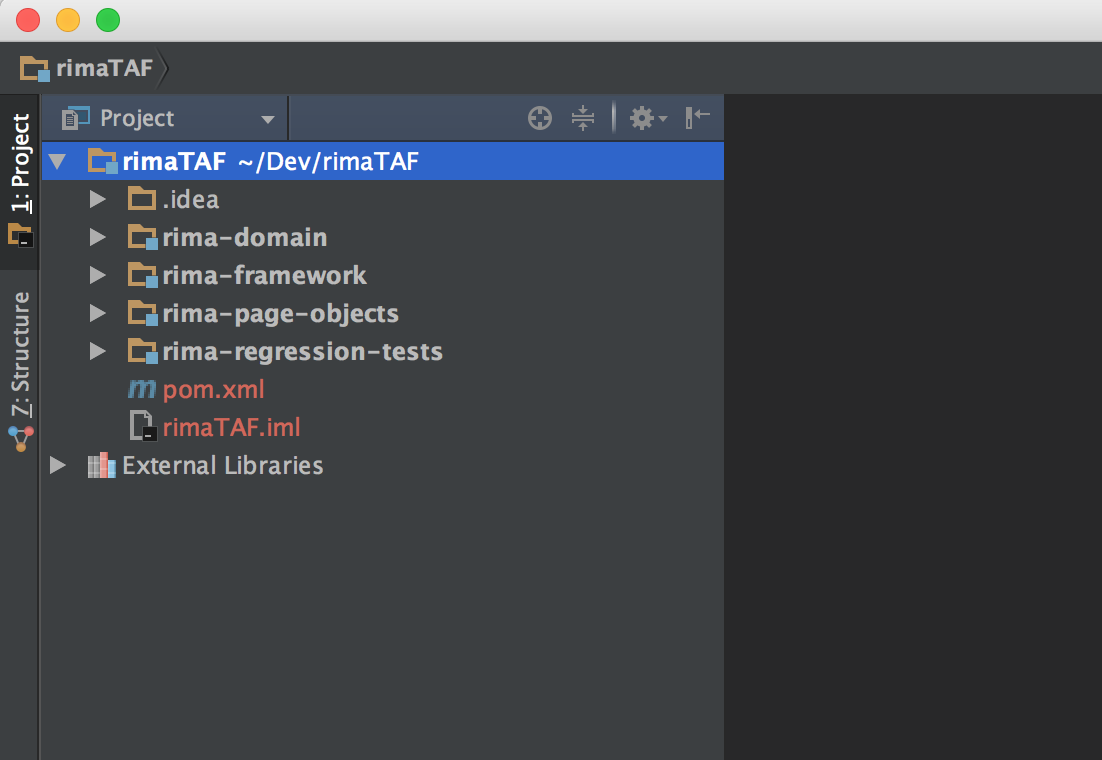
We can then continue creating the rest of the modules in the same fashion. Once we have created all the modules, our project should look like below
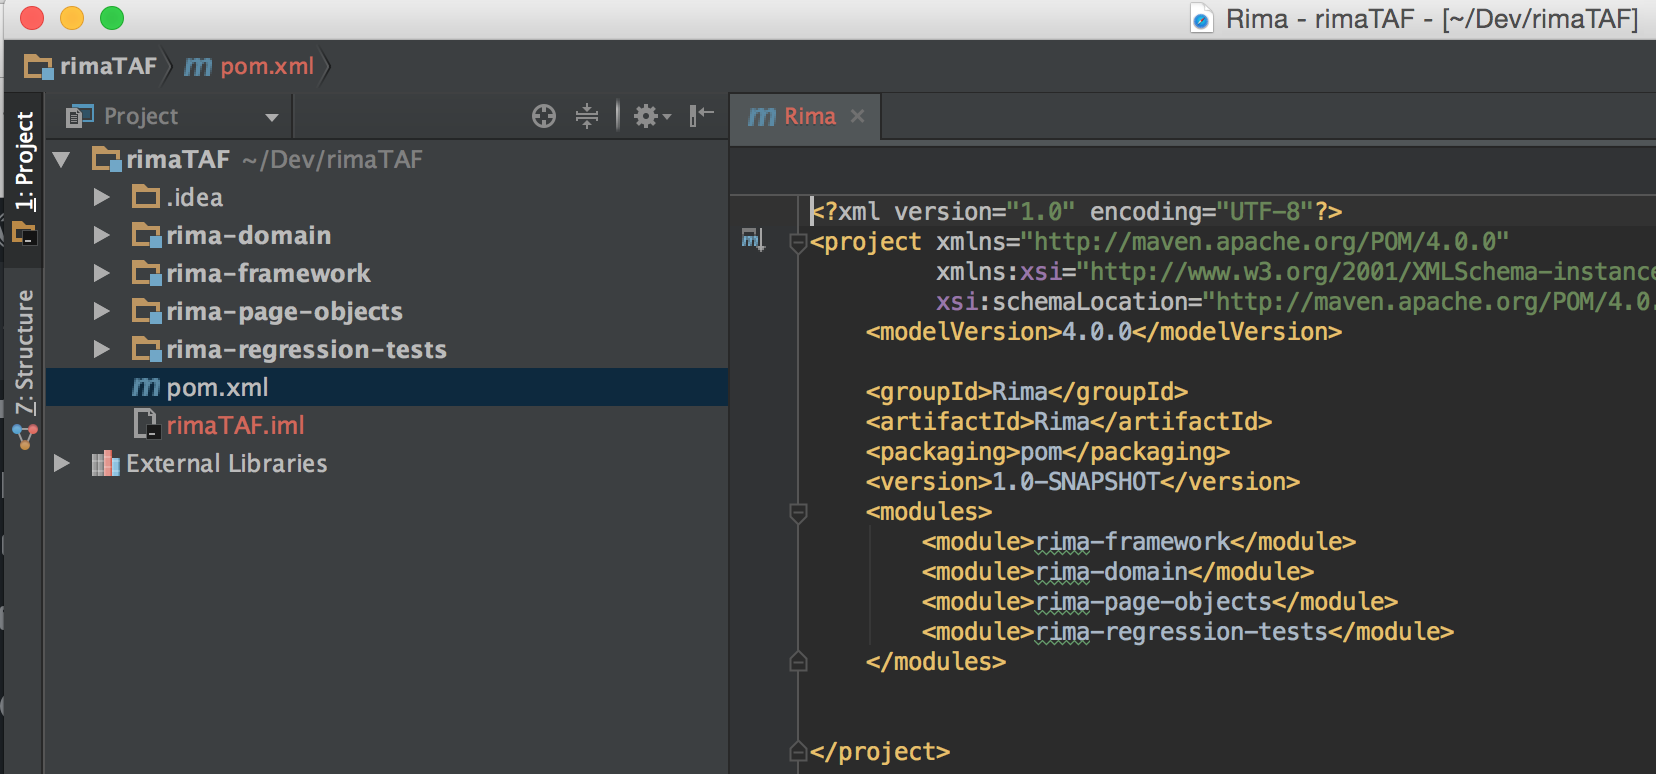
And finally, all the modules have been added to the root pom.xml
Add Dependencies
Next, we need to add the dependencies between the modules in the framework as well as adding the libraries and other maven projects that our Test Automation Framework is dependent on.
I have added the dependencies in the pom.xml files. You can take a look at the pom.xml files in my GitHub repo:
https://github.com/AmirGhahrai/Rima
In part 2 of this tutorial, we will go through the actual Test Automation Framework code written in Java, WebDriver and TestNG.
And, here is the link to Part 2 of this tutorial: