JMeter Tutorial: Testing REST Web Services
In this Jmeter Tutorial, we look at how we can test a REST API or Web Service using Jmeter tool.
We can use Jmeter to send Json request to a RESTful Web Service and also parse the Json response.
Test Plan for REST Web Service
- Thread Group
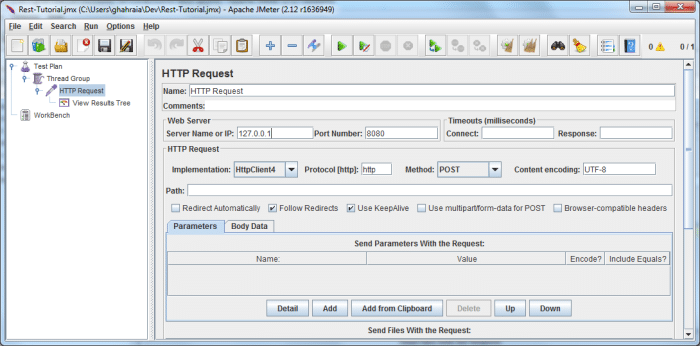
- HTTP Request
Like with any Jmeter tests, we first need to create a Thread Group along with a HTTP Request Sampler.
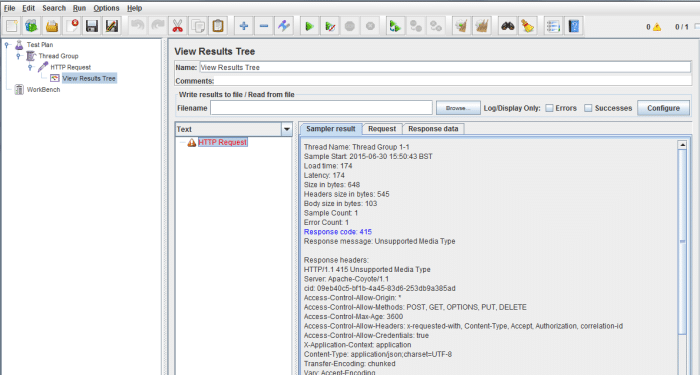
If you now run the test, you may get an error with a response code of 415 and a response message “Unsupported Media Type”.
This is because the REST API might expects ”Content-Type” and “Access” parameters in the header request.
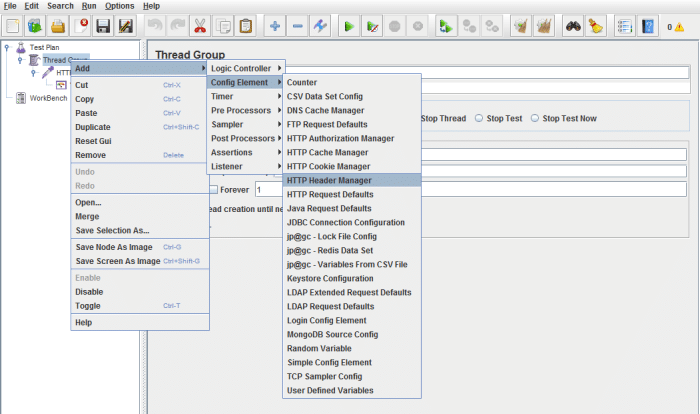
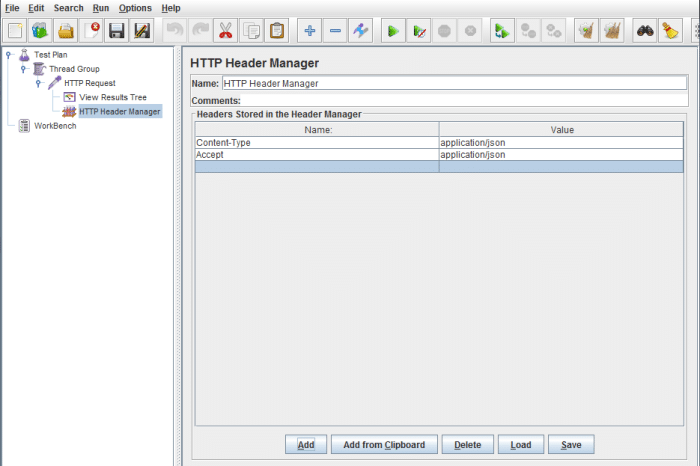
- HTTP Header Manager
Next we need to add a HTTP Header Manager to send parameters in the header of the request. We need to send “Content-Type” and “Access” variables as request headers.
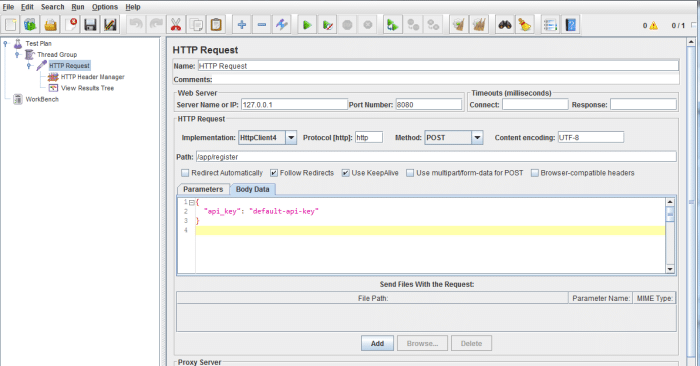
Most probably, you need to register your application via an API key. This needs to be sent as a POST method to the REST API in the body of the request.
- POST data in the Body of Request
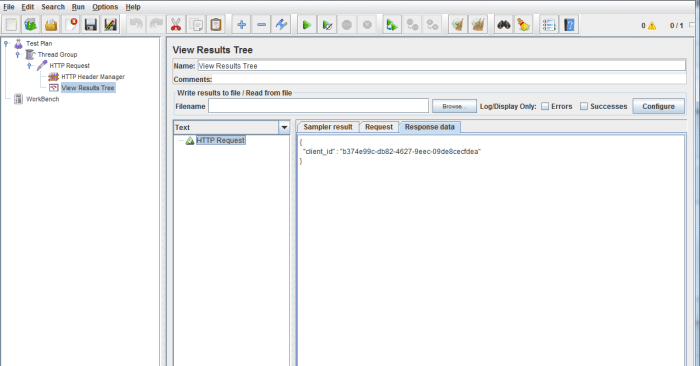
And the response in Json format
Next is to extract or parse the Json Response.
- Extract Json Response
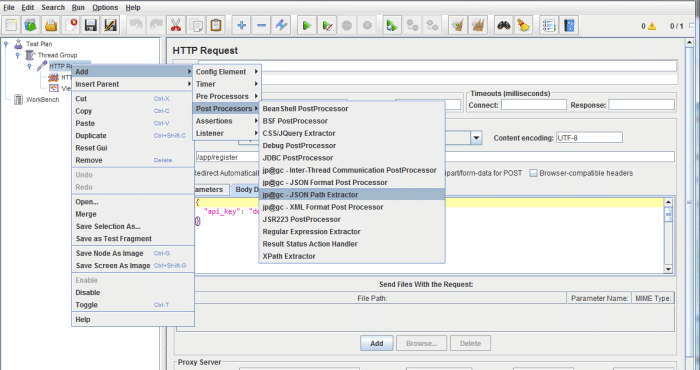
Jmeter has a handy plugin called JsonPath which can be used to parse Json responses.
Once you have installed the above plugin, we can use the Json Path Extractor as a post processor
Once we have added Json Path Extractor to our test plan, we can use the dot notation to reference the Json elements.
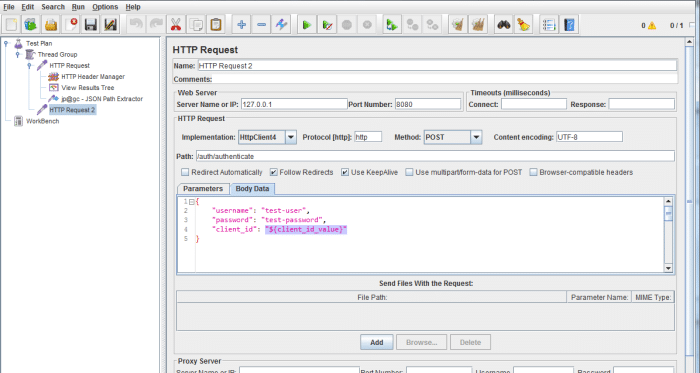
In this example, we want to extract the value of the “client_id”:
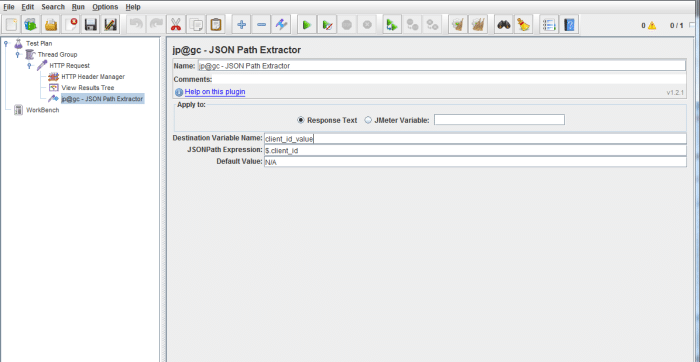
The value of the “client_id” will be saved in the variable named “client_id_value”. You can give any meaningful name you wish.
Once the value is saved in the variable name, we can recall the value by using that variable name in the format ${client_id_value}